How to Use a Protractor

Joe is the creator of Inch Calculator and has over 20 years of experience in engineering and construction. He holds several degrees and certifications.

Bailey is an experienced educator and specializes in K-12 math and science. She holds a Master's degree in professional education and holds several teaching certifications.
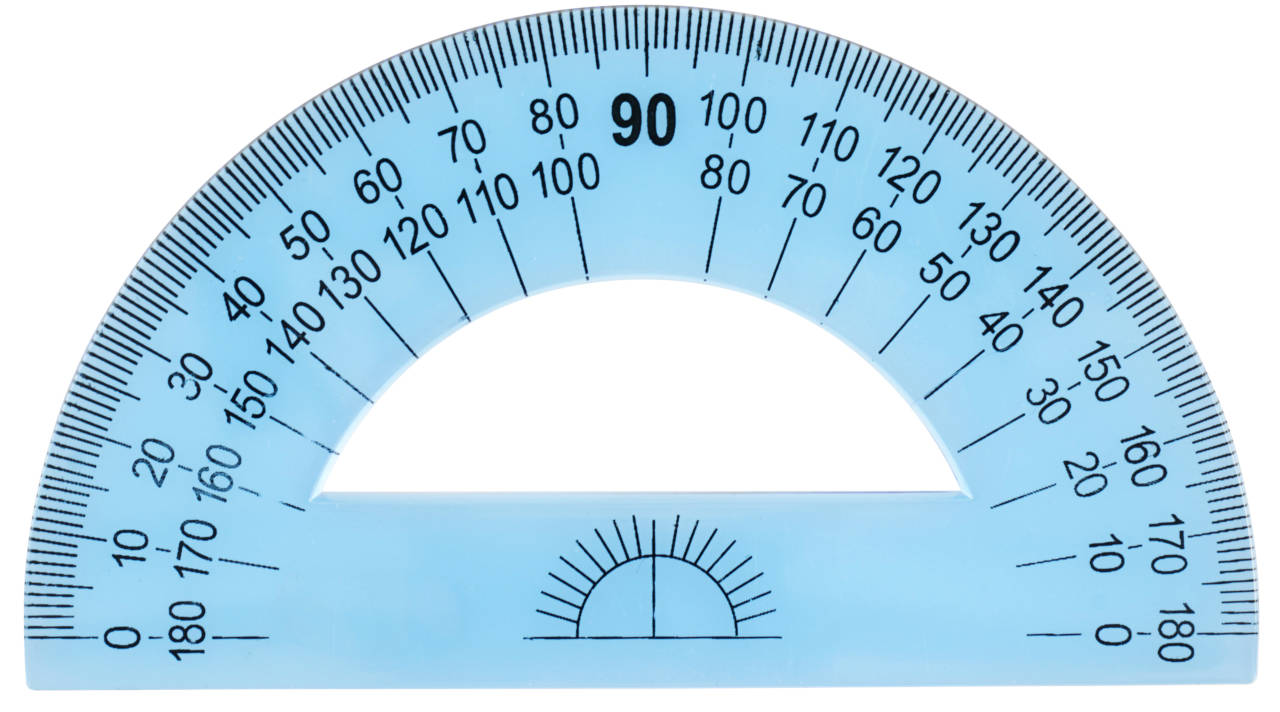
A protractor is an instrument for measuring angles, typically in degrees.[1] They come in semi-circle versions like the one shown above, or full circle versions, though the semi-circle is the most common type.
A semi-circle protractor measures 180° while a full circle ruler can measure 360°. Often protractors are clear so you can see your lines and shapes beneath the tool while measuring, and they have a series of tick marks along the outer edges for measuring angles.
How to Measure an Angle Using a Protractor
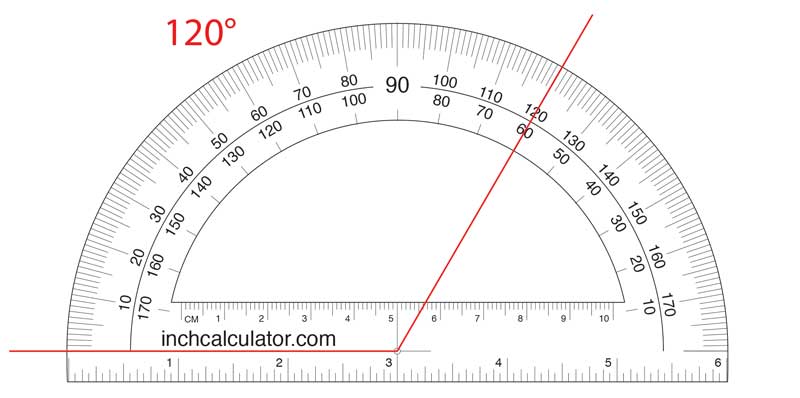
You can use a protractor to measure an angle in a few simple steps. First, identify the vertex, or center point, of the angle, then place the origin/center-point of the protractor over the vertex. Then line up the bottom edge of the protractor with one of the edges, or rays of the angle, and finally read the measurement of the angle.
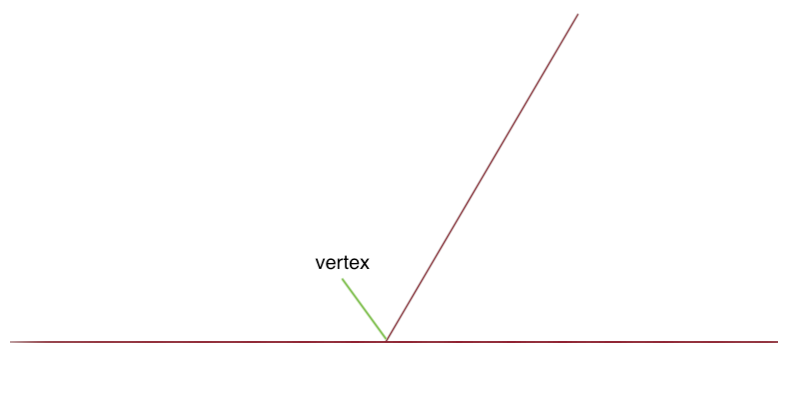
Step 1: Find the Vertex or Center Point of an Angle
The vertex of an angle is the point of intersection where two rays (lines) meet.[2] Locate the two lines and see where they meet. If the two lines of the angle do not touch then use the straight portion of the protractor to extend the lines until they meet to find the vertex.
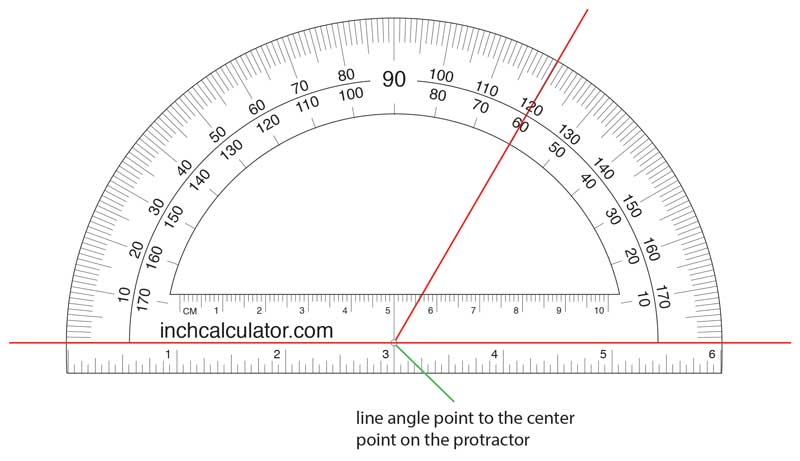
Step 2: Place the Protractor Origin Over the Vertex
Locate the origin on the protractor, which is near the straight edge of the protractor and in the center. There is usually a hole or circle marking the origin with vertical and horizontal cross-hairs to align the origin on the vertex perfectly.
Align the horizontal edge of the origin with one of the edges of the angle so that the other edge of the angle extends to the measurements along the curved edge, as shown in the image above.
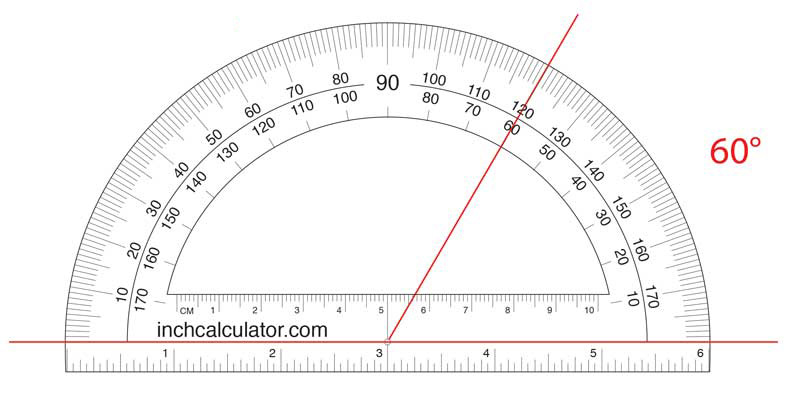
Step 3: Find the Angle in Degrees
There are three types of angles that you can find using a protractor: acute, obtuse, and right.[3]
An acute angle is the smaller angle where a line meets another, or technically any angle that is less than 90°.
An obtuse angle is the larger angle where a line meets another, or technically any angle that is more than 90°.
A right angle is an angle that is exactly 90°, which means that the two lines are exactly perpendicular to each other.
How to Find the Acute Angle
If a line were to meet another line forming two angles, the acute angle would be the smaller angle. With the origin of the protractor aligned over the vertex of the angle and the horizontal edge aligned with one of the lines, find the tick mark along the curve where the line meets.
If the acute angle is on the left the tick mark will be on the outside, or outer-most edge, of the protractor. If the acute angle is on the right then the tick mark will be on the inside of the curve.
There are two rows of tick marks on a protractor to allow measuring the degrees of angle from either the left or right. The measurements should be incrementing in the direction you are measuring.
How to Find the Obtuse Angle
If a line were to meet another line forming two angles, the obtuse angle would be the larger angle. With the origin of the protractor aligned over the vertex of the angle and the horizontal edge aligned with one of the lines, find the tick mark along the curve where the line meets.
If the obtuse angle is on the left the tick mark will be on the outside, or outer-most edge, of the protractor. If the obtuse angle is on the right then the tick mark will be on the inside of the curve.
How to Draw an Angle Using a Protractor
Protractors are also great for drawing accurate angles. Follow along to learn how.
Step 1: Draw the Baseline
The first step is to draw a straight line on a sheet of paper using the straight edge. This is the base line or arm of the angle
Step 2: Draw the Vertex
Next, draw the vertex of the angle at the end of the line.
Step 3: Align the Protractor on the Vertex
Now, align the origin of the protractor with the vertex on the line, then align the base line of the angle with the line on the bottom of the protractor.
Step 4: Locate the Angle Mark
The next step is to locate the tick mark corresponding to either the obtuse or acute angle you wish to draw. Make a mark on the paper as close as possible to the tick mark.
Step 5: Complete the Angle
Finally, complete the line by connecting the vertex and the angle mark you just added using the straight edge of the protractor or a ruler.
Useful Angle Tools
Since most protractors have measurements in degrees it is often necessary to use a formula to convert your measurement to radians, mils, or grads. Use our angle conversion tool to convert from degrees to radians, mils, or grads.
If you need a protractor you can use our free printable protractor.
References
- Cambridge Dictionary, https://dictionary.cambridge.org/us/dictionary/english/protractor
- CK-12 Foundation, https://www.ck12.org/geometry/identification-of-angles-by-vertex-and-ray/lesson/Identification-of-Angles-by-Vertex-and-Ray-MSM6/
- AlgebraLAB, http://www.algebralab.org/lessons/lesson.aspx?file=Geometry_AnglesAcuteRightObtuse.xml